

How to Customize WordPress Navigation Menus
 The purpose of your WordPress menus—also known as the navigation or “nav” bars—is to help your website visitors around your website.
By default, most WordPress themes put the pages you create into your navigation bar—in the order they are created (you can change the page order numerically by editing the page attributes). This default setting may be fine for some sites; for others you may want complete control over your menu.
Some themes have both primary and secondary navigation bars, which requires you to customize your menus to change what appears where. Usually, the primary navigation appears below the header, the secondary above the header. But that can be changed with coding.
How to Create a Custom Menu
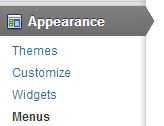 To create custom menus, choose Appearance in your WordPress dashboard and then click Menus. You can also usually access the Menus option from the Toolbar.
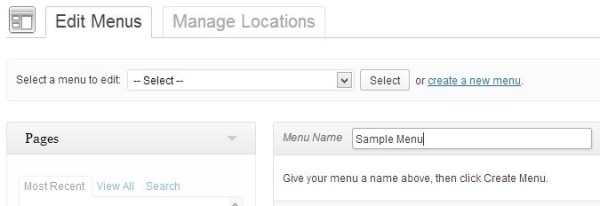
1. Name the menu.
Choose something simple and easy for you to remember–no one else will see this.
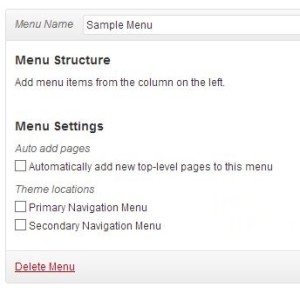
2. Choose the theme location for the menu.
If you have only one menu, you’ll usually want to choose the Primary Navigation Menu.
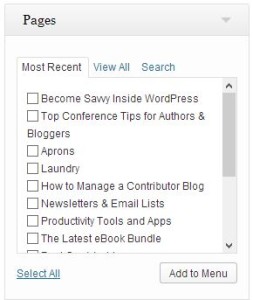
3. Add pages, categories, and custom links.
Check the boxes beside whichever pages or categories you’d like to add to your menu and click “Add to Menu.” To add a custom, off-site link, choose Links and type the link and page name.
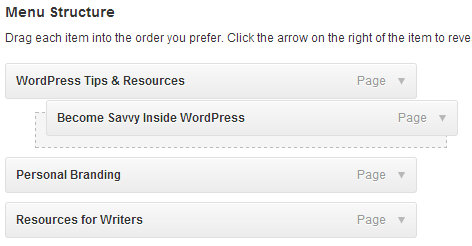
4. Drag and reorder to your heart’s content.
Drag the menu items to reorder. Drag a menu item to the indented spot below another menu item to create a drop-down effect in your menu.
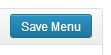
5. Save your menu settings!
It’s easy to edit a menu and forget to save your settings. Be sure to click “Save Menu” before you close your browser. You can also choose whether you’d like new top-level (parent) pages added to the menu by default, so that you don’t have to come back and edit your menu each time you add a new page.
Menu Tips
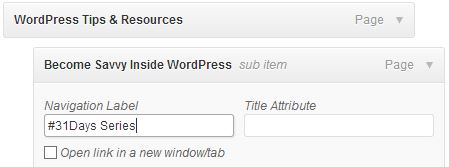
- Click the drop-down arrow by any menu item to change the navigation label that appears in the menu itself. This changes only the text that represents the page in the menu, but does not change the actual page name. (This might be handy if the original page name was too long compared to the rest of the menu.)
- Adding pages and categories using the appropriate box (shown in step 3 above) ensures that if those page or category links change, the link will automatically change in the menu.
- If a page or category name changes, the name will also be changed in the menu–unless you’ve already specified a navigation label within the menu.
- Create a custom link with only # in the link area to create a parent menu item that doesn’t actually link to anything (i.e. a drop-down that is not a link itself).
- Add a menu to your sidebar widget area by choosing the “Custom Menu” widget.