DIY Clothespin Bag
My last clothespin bag fell apart along with my clothesline a couple years ago so when I bought a new clothesline through Amazon earlier this year, I was in desperate need of something to put my clothespins in. The only problem was, I kept forgetting to look for a new bag whenever I went to town.
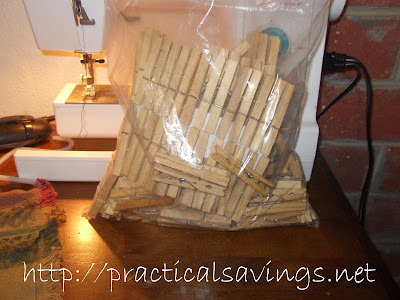
My clothespin “bag” has been a gallon size ziploc bag for the last couple months and that is about ready to fall apart too. I finally came to the conclusion several weeks ago that I should just make my own clothespin bag. I have so many scraps of material that would work, I really had no need to buy a ready made bag. But it was time to actually make a bag before my ziploc fell apart completely.
After some Googling and looking at pictures, I decided on a simple placemat clothespin bag. I like to grab clearance placemats whenever I see them as I make handbags out of them for Christmas presents. Over time, I’ve been able to build a small collection of placemats.
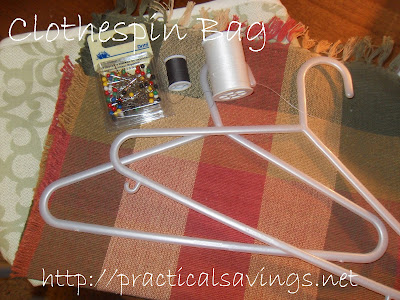
What you’ll need:
- 1 Placemat
- 1 Hanger (I used a child size hanger)
- Thread
- Pins
- Sewing Machine (you could do this by hand but it would obviously take longer)
I was going to make two bags yesterday but ran out of time so that is why you see two of everything. 🙂 Also, if you don’t have a child size hanger, use a regular sized one. The child size is about the same width as the placemat so you’ll have less sliding back and forth but a regular one should work too. If you notice in the photo, one hanger has the little hooks while the other hanger doesn’t. Make sure, if you hanger has hooks, to clip them off. It will make it easier to sew the material over the hanger.
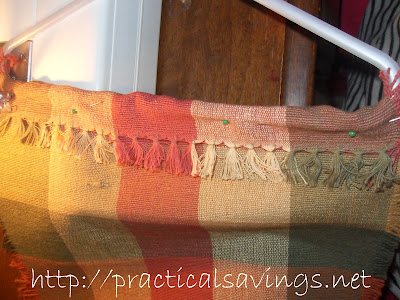
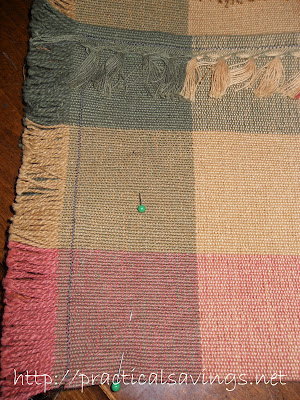
Pin one of the short ends over the hanger. Give enough allowance so that you’re not sewing right by the edge. I wanted plenty of allowance with this particular placemat since there was a fringe and I didn’t want it separating by the seam.
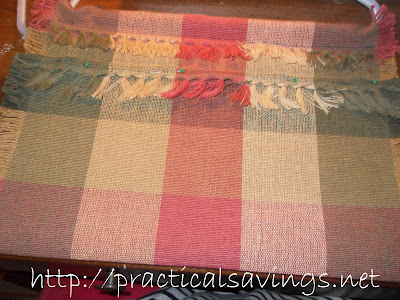
The placemat I chose has fringe on all four sides so I decided to fold down the opposite side from the hanger and make a seam, making the fringe hang down instead of standing up. You won’t need to do this step if you don’t have a fringed placemat.
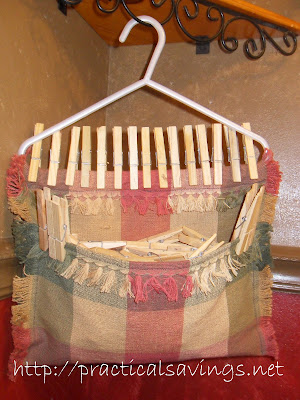
Next, fold the placemat in half, pin and sew a seam on both ends. Clip the threads and you’re done. 🙂
I have little experience when it comes to sewing but this project took less than an hour from start to finish. All of the supplies were things I had on hand. If you don’t want to use a hanger, you can always make straps, which will take longer but will be less likely to break. If/when the hanger on mine does break and if the bag is still in good shape, I’ll probably add straps of some sort later on. For now, this is working out really well.


Cute and easy — I like!
I use a plastic shower caddy and leave it outside: Things stay contained without sitting in water.
Uh-oh, I just leave mine clipped to the line. One load comes down and another load goes up.
But, this is a great idea!
Blessings.
I take mine off because of how weathered they get if I leave them on the line. They end up getting rough so much more quickly, and snagging the clothes! Besides, for some reason, they are always in the wrong place if I leave them on the line for next time. I guess it’s one of my laundry quirks that Chantel’s post talks about. 😉
so cute! I use an apron to hold my clothespins and love that- but this is such a nice simple idea!
I’m kinda liking the apron idea myself, Natasha. 😉 But this is ultra-simple and cute, Kelly!!