How to Organize Your Blog Archives (3 steps to sort your content)
Whether it’s the coming of a new year, the first signs of spring, or the beginning of the school year, a change in season always makes me want to do some housecleaning—on my blog, that is.
The rules of SEO are always changing, and I’m constantly learning more about content creation and optimization. So right now, I’m focusing on sorting my archives, optimizing, organizing, and sifting as I go. I want to familiarize myself with what’s actually on my blog so I can link to it as appropriate, pin it as I have opportunity, and keep it up to date as necessary.
1. Optimizing Popular Posts for Future Traffic
Identify & Optimize Top 20 Posts
First, I looked at my top 20+ posts and pages in the past month and the past year (in Google Analytics, go to Standard Reports, Behavior, Site Content, All Pages). The posts that are continually getting traffic are the ones that I wanted to optimize first.
Optimize Older Posts to Create Evergreen Content
Some posts simply need a bit of editing to be brought up to date (I wrote “a book lover’s Christmas gift guide” in such a way that I could simply make a new graphic without the word “Christmas” and it would be ready to be updated and pinned the rest of the year). Others need an affiliate link or a call to action to be more profitable (are you sending readers to someone else’s blog instead of giving them an affiliate link or another page on your own?). And some posts just need a few SEO tweaks to bring them out of hiding (use Yoast’s SEO plugin to make sure your post can be found when people search for your topic).
2. Organizing Evergreen Posts into Themed Content Landing Pages
Organizing my blog is an ongoing challenge. Just when I have all my landing pages perfectly arranged in my menu, I decide to branch out into some other topic. As soon as I finally finish coordinating pinnable graphics, I change my blog’s colors and layout. But content landing pages should always be a work in progress. Our readers want to know that they will be up to date with the latest information and best links on the subject, from our blog and a select few other sources.
Choose Recurring Themes and Create Content Landing Pages
I write frequently about WordPress and Social Media. Those are no-brainer topics for landing pages that I will keep up to date and organized. What are your main topics? What are the series you are always referring people to but you have nothing but the link to the category, with backward-organized posts, to send them to? That’s what you need to make a content landing page for. Title it with the most SEO friendly title you can think of (a “how to” or a question are often your best bets), write a short into explaining your passion for the topic and a bit of what makes you qualified to talk about it, and include links to your best posts on the subject. As you have time, add a one or two line description of what you talk about in each post below the post title on your content landing page, to increase the likelihood they will click through to read it and to add some extra SEO power as well. (Be careful not to duplicate exact wording from your posts, in the landing page intro or description, or your SEO will go backwards instead of forwards.)
Highlight Popular Posts on a Favorites or “Start Here” Page
Every blogger has some posts that define who they are as a blogger. It doesn’t matter if those posts are evergreen, they represent the best of your blogging career. Create a “favorites”, “best of”, or “highlights” page and put those links there. Seek out the gems hidden in your archives and highlight them for all to see. Maybe you’ll create an additional “start here” page where you want to send your first-time visitors, or maybe your start here page will be your “best of” page. Think through what you want your readers to find when, and organize your pages and menus in that manner.
3. Sifting Archives for Irrelevant, Outdated Posts
I’ll never forget what a relief it was to be at my first blogging conference and hear some really “big” bloggers talk about their blog archives. One told about that time they deleted a whole year’s worth of posts. Another mentioned that they went through a made a bunch of posts private that had to do with a specific relationship or life event that they decided the rest of the world didn’t need to be able to read about any more.
Once I’ve optimized my top posts and landing pages, I plan to go through month by month (starting with the most recent months first, since they’ll be the quickest to glance through and be done with) and literally sift my blog archives. Obviously, I’ll add categories and tags where appropriate, check for broken links, etc. but my primary purpose will be deciding what is worth keeping on my blog.
I’m sure I’ll find some posts that had good information but are now very outdated; I’ll either update them or make them private and make a note in Todoist to write a new post on that topic sometime. There will be doubtless be some duplicate content I’ll need to deal with in one way or another. I’m positive I’ll find some of those Twitter-length posts where I was sharing a good quote or link; I’ll trash those and move the information to a more appropriate location (perhaps Tumblr or Evernote?). I know I’ll find some irrelevant personal posts that were more thinking out loud than anything else; I’ll make those private, so I still have a record of those milestones in my family’s life, without feeling like I’m cluttering my archives. And hopefully, I’ll find some gems tucked away that need to be highlighted on my “favorites” page. They might not be evergreen content as the blogging experts define it, but they will be filled with one heart’s examination of timeless truths, and that’s what’s really evergreen.
Tips:
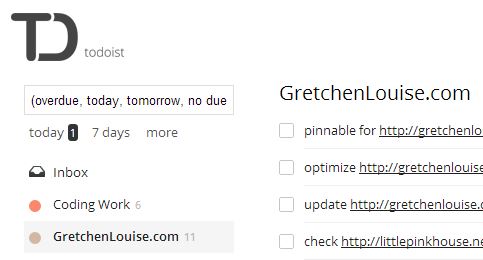
Todoist Project: I knew that if I followed every rabbit trail during my blog organization process, I’d never get anywhere. So when I notice a page that needs a new image or a post that needs time-consuming optimization, I put the link in a project I’ve created in Todoist just for my blog (read more about how I use Todoist). When I have extra time, I can go there and attack the most pressing item on the list without adding pressure with deadlines or taking time out of the sorting process.
Screen Options: I use the All Posts area to sort through my posts, as it’s much easier to quickly add a tag or make a post private via Quick Edit or Bulk Edit from that view rather than visiting the front end of my blog as my readers do. To make the viewing more efficient, I used the Screen Options to display only the most pertinent information (read more about Screen Options).
Then, I clicked the excerpt mode button that showed me the post excerpts in addition to the other information (versus simple “list” mode). Half the time I can make a decision about the post just by seeing its excerpt, and make the changes via Quick Edit—I never have to go all the way into the post to edit it (and that’s nice for those of us with temperamental internet!).

Redirects & 404s: If you unpublish or trash many posts that people will come looking for, you might want to redirect those links to pertinent landing pages or else beef up your 404 error page. Use a plugin like Redirection to track 404 errors and create redirects if you aren’t familiar with .htaccess. Or edit your 404 page to be more personalized, and maybe even clever (be sure to include a search form prominently on the 404 page!). Genesis 404 Page makes it easy for Genesis users to edit a 404 page; other themes may require custom coding. Click here for some creative 404 page ideas.
How often do you go through your blog archives? What are your organization methods and sifting guidelines?
Read more:


Thanks for sharing! This post motivated me to look through my archives and update the graphics with Canva and make my posts a little more ever-green!
Could you please explain more or give examples of a Content Landing Page? Is it a page that you frequently have to go back into to add more recent links?
Yes, a content landing page is something like the pages I highlight in my menu. For example, this is my blogging content landing page: https://gretchenlouise.com/bloggers/ It’s a page (rather than a post or a category listing) that I update manually with links to my best posts on the subject. On my most popular content landing pages I actually write a brief summary of each post, so people know what to expect, as in https://gretchenlouise.com/email-lists/ or https://gretchenlouise.com/mastermind-groups/
Check out these posts on cornerstone and content landing pages, as well:
http://fedobe.com/cheatsheet-for-an-efficient-seo-landing-page/
http://www.copyblogger.com/cornerstone-pages/
Thank you for this post. I am in the thick of blog reorganization as I move from one domain name to another. In my case, I cannot just export/import because all my posts have watermarked pictures. So I am going through each posts one by one. On one hand, I like being able to take a fresh look at the posts and beef them up according to what I’ve learned. On the other hand, it’s a major project, we’re taking 600+ posts to sort, delete, mark private or reformat with new pictures/pinnable images.
That is a big job, Jenny! Can you just do the export/import and then work your way back through the watermarked images gradually? When we rebranded YLCF to Kindred Grace I never even went back and fixed the watermarked images, since the domain still redirected. It would be quite the job!
We’re looking at a possible sale of the domain name so I would need to change all watermarks since there will be no redirect in place.
Oh, that makes sense. Whew, what a project! How would the sale of the domain name affect your pins?
UGH! Good question. What do you think? Will I have to track them all down and change the url link? But then they would still have the old watermark…again, what are your thoughts?
Well, even if you could change all the URLs in every pin you had ever pinned, there are still everyone else’s pins over which you have no control of. If it were me, I would make the sale of the domain contingent on there being an .htaccess file of 301 redirects that would, line by line, redirect each post to your new domain.
Well, isn’t this awesome?! Thanks, Gretchen; I’ve already checked Google Analytics and I’m working on a Highlights page and linked images in my sidebar. 🙂
Good for you, Rachelle! Have you seen an even greater increase in traffic to those posts you’ve highlighted?
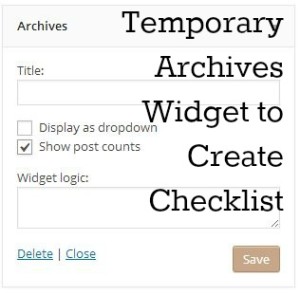
The archive widget import to MS Word is a very good tip. I wouldn’t have thought of it. Thank you!
You’re welcome, Lydia! Glad it was helpful.
Thanks for this very interesting and useful post!
I love the new look of your blog.
Thank you, Lise! I had fun with the redesign.
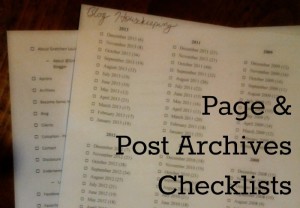
These are such great ideas! I keep needing to do this, but it just seems so overwhelming. Thank you for the simple step-by-step! I also love the checklist idea in Microsoft Word. I think I will do the same, but just transfer over to Evernote for easy access.
Good idea! Not sure why I felt I had to have this checklist on paper, but I’m loving the checklist options in Evernote these days. Perfect paperless option!
Such great suggestions! I love the archives into checklist idea. Did that widget just give you the months of your posts or the actual name of the post? Is there a widget that would give you a name of the post?
The widget just lists out every monthly archive link, so it’s just the months. To have a checklist for every post you’d have to custom code an archive style page, copy it from your All Posts area, or use a plugin like Clean Archives Reloaded.
When you make a post private or *gasp* delete a post, what do you do about the 404 error that follows?
If I thought it was a post people might actually have links to, I’d redirect it to a pertinent landing page. But for most posts I’d delete or make private, no one would have any links to them because they are truly irrelevant and outdated.
But my 404 page is one I want to work on… 🙂
I wouldn’t say nobody has links as I am sure Google has archived your whole site. So if someone did search for a term that Google might find your deleted page for you will get a 404… Of course you could just redirect all 404’s to your home page which I am thinking about doing myself as I go and purge my personal blog and upgrade it very soon…
I suppose that’s true. I still don’t think they are any posts that people would search even Google for. But I am thinking of doing a creative message on my 404 page and including a search box (I liked some of the fun ideas here: cornerstoneconfessions.com/2014/01/10-creative-404-error-pages.html). Though a simple redirection to the home page is another good idea.
I added a tip about 404 pages and redirects (and I’ve already customized my 404 page). Thanks for pointing out that omission!
Hi Gretchen Louise, thanks for the info. I would have never thought to delete a post or make it private but it makes sense. I probably have a few not so good posts that I could say good bye to. As far as updating goes, I have thought about it but didn’t have a game plan – now I do. Thanks. Best wishes, Darlene
Thanks for commenting, Darlene! So glad the post had some helpful suggestions for you.