

Top 10 Places On Your Blog to Convert Visitors to Subscribers
(This post contains affiliate links. Read my full disclosure.)
Converting readers to subscribers isn’t always easy. If content is king, then having a fabulous freebie to offer your email subscribers is surely the queen. But what you really need is a court jester or two dancing around on your blog, inviting your visitors to subscribe. Preferably, you’d name them Jester A and Jester B and do some A/B split testing to see which subscription form converts more readily!
There are a lot of options when it comes to when, where, and how to add a form inviting readers to opt in and become active subscribers. Here are the top ten locations to put an opt in form, and the most popular plugins and formatting options to use in each spot.

1. Header Bar
One popular way to catch the eye of your visitors is to place a brightly-colored bar across the very top of your site, offering the latest announcements, specials, and, of course, a subscription form. These header bars display right in the uppermost spot of every page on your site (where you see the WordPress Admin Bar when you’re logged in to your dashboard).
Header bars are usually easy to minimize or ignore once you’ve subscribed, but once in awhile they can nearly obscure the page on mobile view. They also don’t play well with a theme that has a “sticky” navigation menu that remains visible at the top of your site as you scroll. If you use a header bar, be sure to test your site thoroughly on several devices to make sure it’s user-friendly.
- Hello Bar: Hello Bar allows you to connect to popular subscription services and design a custom subscription bar for the top of your site–in addition to other “click here” ads or social media options. The free version is branded with the “H” logo and limited to 10 bars and 25,000 views before it shows ads.
- Many Contacts: Many Contacts is a subscription-focused Hello Bar alternative that brings your signup form right into that bar across the top of your site. You can have unlimited bars per account, and the current accounts are “free forever”. (Click here for a review of Many Contacts Subscription Bar.)
- MailChimp Top Bar: An add-on to MailChimp for WordPress, this plugin allows you to configure a header bar for your MailChimp list without signing up for any additional accounts.
- Add a Widget Area Before Your Site Header or Create a Utility Bar Above Header in Genesis: Alternatively, if you’re using a Genesis theme, it’s easy to create your own header bar area and style it however you want.

2. Header Widget Area
Many themes have a widget area built into the header, and some even display a sign-up form there in theme demos. Many StudioPress Themes have special CSS features applied to the Genesis eNews Extended widget when it’s in the header area, creating a unique and attractive subscription box.
The beauty of a header area subscription form is that you can make it eye-catching and enticing. It’s the first thing your visitors see. And they’ll want to click. The problem is that it can distract from your site’s logo, not to mention make header layout difficult, especially on mobile. But that doesn’t mean it can’t be done well.

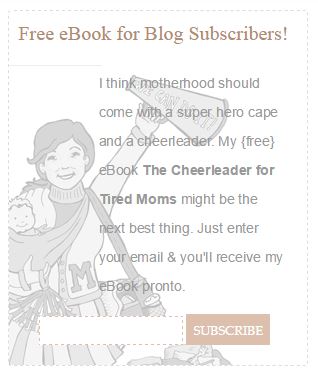
3. Sidebar
Sidebar space is precious. But it’s a prime spot for a subscription box. You’re not cramped by the size restrictions of the header, so you have plenty of room to feature an image of that freebie they’ll get just for subscribing. Whether it’s a simple box asking for their email address, or a full-color graphic with a call to action to get a free download, sidebar subscription forms work–and they rarely annoy people like popups do.
- Genesis eNews Extended: For StudioPress themes, this plugin makes it easy to add a subscription form to your sidebar.
- Mad Mimi for WordPress or Official Mad Mimi Sign Up Forms: If Mad Mimi is your email service of choice, these plugins provide easy widget configuration for inserting your signup forms anywhere.
- Code Your Own: The sky’s the limit with a Text Widget and the raw embed code from your email service. Use all sorts of HTML formatting, add images and borders–it’s all in the code. If you want to add a background image to your subscription form, add or edit the style section of the form code. Find the <form opening tag in your code and add the styling after it (or, alternatively, apply the CSS to the specific text widget where the form resides). Be sure that your minimum and maximum height are the same as the image height–and that the image height allows enough room for your form!
<form style="padding:25px;text-align:center;min-height:255px;max-height:255px;background:url(https://gretchenlouise.com/mailbox.jpg)no-repeat center;"</form>

4. Popup or Slide-Out Subscription Box
Love them or hate them, popups they have great optin rates. The key with a popup box is to make sure you can control its appearance–and non-appearance–based on clicks, scrolling, and cookies.
Scroll-triggered boxes appear when a site visitor has scrolled past a specific area on your site. It might be percentage of page height, or after a certain layout element has been passed (i.e. post or comments). Popups can appear after a certain number of seconds, when a user has scrolled past a certain point, or when the plugin determines that the user is intending to exit your page. And, ideally, your subscription box won’t keep popping up every time someone visits your site: if someone closes the box or subscribes, don’t let it reappear for 90 days or until cookies are cleared.
- SumoMe: The List Builder app from SumoMe is a free alternative to Pippity and others that can help you decide whether a popup works on your site. If you like it, you may want to upgrade to remove the SumoMe logo from appearing in the upper right hand corner of your site. SumoMe connects to many popular email services, but you’ll want to use the custom mode with hidden fields if you’re using multiple list groups. SumoMe is one of the few free plugins that provides conversion analytics so it’s definitely worth a look.
- MailMunch: With options for a top bar or embedded sidebar, in addition to popup and slideout, MailMunch has a lot of options. You can set it to appear once a user has scrolled through a certain percentage of the page, or when they are about to exit. MailMunch connects to MailChimp or Mad Mimi (among others) to retrieve your list, however there do not appear to be any group subscription options available, at least in the free version of MailMunch.
- Scroll Triggered Boxes: An easy to use plugin that allows you to create scroll triggered boxes just like you were creating a new post–except, you’ll be adding your subscription form embed code instead of post content. Specify background color, box position, trigger point (including layout element), animation, cookie expiration, and more. Allows you to create custom rules for where the box will or will not display, and automatically hide box on screens smaller than a certain size.
- Dreamgrow Scroll Triggered Box: Dreamgrow’s plugin is very user friendly, allowing you to add new scroll triggered boxes just like you’d add a new page or post. Upload a background image and close button image, change transition and slide in effects, set auto closure, and so much more (including layout element to trigger display). Just paste your subscription form embed code and you’ll be all set.
- PopupAlly: PopupAlly provides a clear, professional looking popup, with options for adding your logo, call to action text, customizing text and button colors, and more. Specify a popup after so many seconds, or on exit intent–and tell it how many days to wait until showing it again. Also has an option for a thank you page after someone has subscribed.
- Pippity: Pippity is a quality, trusted plugin that’s worth paying for. With A/B testing, pre-designed themes, and all sorts of options for when and where your popup shows, Pippity is a popup that won’t annoy your visitors. Plus, it provides you with amazing analytics–and conversion rates.
- Optin Monster: A popular professional plugin, created by WPBeginer, this one will grab your attention when it pops up and shows you all its special effects.
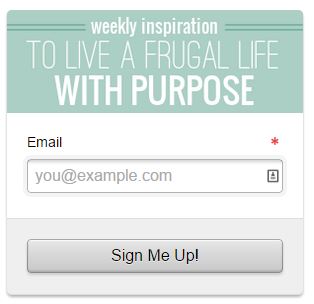
5. In Page Subscription Form
Right within the page is one of my favorite places to put a custom subscription form. Naturally, your home page will feature a subscription form. But your “About” and “Start Here” pages are also perfect places to highlight your popular posts and invite new readers to subscribe for more. Custom landing pages for products or your most popular topics are another natural spot to mention that you write often on the topic and ask them to subscribe.
And of course, I think every site should have an actual “Subscribe” page. Don’t make readers leave your site to find a subscription form: create a custom page on your own site that describes your subscription options and includes an embedded subscription form. This page (or a custom page featuring the freebie) should also feature a pinnable of your freebie, if you have one! Because when it gets pinned, it will bring people right back to the page where they can subscribe for their own free download.
For in page subscription forms, I prefer to embed my own customized forms with hidden fields and specific CSS. But for ease, try one of these plugins that offers shortcodes to easily embed your subscription form wherever you’d like:
- Newsletter Sign-Up
- MailChimp for WordPress Lite
- Mad Mimi for WordPress or Official Mad Mimi Sign Up Forms
- Optin Forms

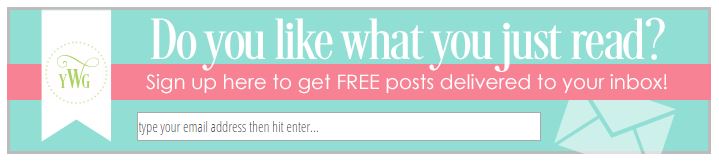
6. After Post Subscribe Widget
When someone has just finished reading a stellar post, it’s a prime time to ask them to subscribe to your blog. However, it’s also adding one more clickable option between the end of the post and the comment box. If comments are important on your blog, your comment box–rather than a subscription box–should be the first call to action after your post. But if your primary goal is to make sure readers are subscribed, then consider adding your subscription form to an after entry widget area.
- Genesis eNews Extended: Use Genesis eNews Extended or a custom coded widget along with Genesis. (If you don’t have an after entry widget area in your Genesis theme, check out this tutorial: How to Add an After Entry Widget Area in Genesis.)
- Subscribe & Connect: This plugin from WooThemes brings the default WooThemes Canvas Subscribe & Connect features to any theme. Integrates with MailChimp, Mad Mimi, Feedburner, and more.


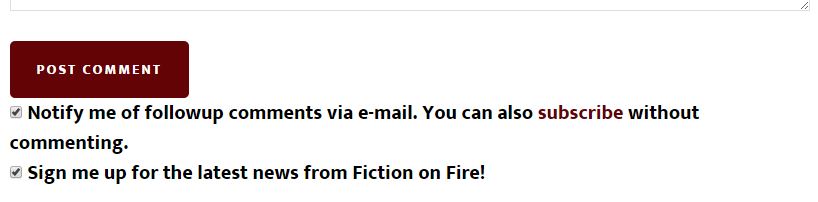
7. Comment Checkbox
Commenters are already providing you with their email address when they are leaving a comment: why not allow them to check a box and subscribe to your email list, too? There are several plugins that make it easy. Just be careful not to get too many checkboxes in the comment section, especially if you’re already using Subscribe to Comments Reloaded (my favorite comment reply subscription plugin).
- Newsletter Sign-Up: This plugin allows you to connect to many popular email services, as well as specify multiple MailChimp groups to subscribe commenters to with just one comment checkbox.
- MailChimp for WordPress Lite: If you have only one MailChimp list with no groups, this plugin makes it easy to connect with MailChimp and add a checkbox after your comment box.
- Subscribe to MadMimi: This plugin hasn’t been updated in awhile but it is supposed to work with Mad Mimi.
8. Comment Thank You Page
If you use a plugin to thank your first-time commenters, that thank you page is a great place to invite them to subscribe and stay in touch!
- Yoast Comment Hacks: Use this plugin to redirect first-time commenters to a thank you page, and give them the option to stay connected by embedding a subscription form.
9. Footer Widget or Bar
If a reader has scrolled all the way down to your site’s footer, they’re committed. It’s a great time to give them one last opportunity to subscribe. If you’re using footer widgets, consider featuring your top or related posts in another footer widget, so they’re more likely to stay on your site despite coming to the end of that page.
- Optin Crusher: A fancy subscription bar, created especially for your footer, this one looks beautiful when it’s in use. It even has a spot for a cut-out display of your freebie. This footer bar displays much like a header bar–always visible, no matter where you scroll on the page.
10. Contact Form
When someone is taking the time to contact you, they probably want to hear back from you in the future. Add a checkbox to your contact form to allow them to easily subscribe when they write you a message.
- MailChimp for WordPress Lite: Allows addition of checkbox to Contact Form 7 and others contact forms.
- Ninja Forms: Ninja Forms is a free plugin, but you can buy add-ons allowing you to integrate MailChimp or Mad Mimi into your Ninja Forms.
- Gravity Forms: The Business and Developer version of Gravity Forms come with integrations for MailChimp and AWeber, plus there’s a free Gravity Forms Mad Mimi Add-On.
And that’s just the beginning of the ways and means of converting readers to subscribers. There are dozens more opt in plugins available for WordPress users–literally a court full of royal officials, ready to be at your service, if only you will pay their price. But if you do decide to hire ten or more court jesters for your blog, please don’t have them all dancing on the same page at the same time. There’s a fine line between a polite, subtle invitation to subscribe and an annoying, noisy recurring message.
Whatever methods you choose for displaying subscription forms on your site, be sure to test them regularly with extra email addresses. There’s nothing worse than discovering your prime spot featured a broken subscription form!
And to protect the reputation of yourself and your list, be sure to always use double opt in for your email lists (that means people get an email with a confirmation link that they have to click–they can’t be automatically added to your list without manually confirming their subscription). Also, note that Canadian Anti-Spam Legislation prohibits the use of pre-checked checkboxes for list subscriptions.
Extra Tips
How to Grab Your Form Embed Code
If you’re using a plugin to embed your subscription forms, you may only need your email service API and other details. However, even some of the plugins will need you to copy and paste the embed code in order to grab the proper configuration. Here’s how to grab your embed codes. (Note that you’ll always paste your embed code into the “Text” tab rather than the “Visual” tab in WordPress.)
- MailChimp: Click Lists, choose your list name, click Signup Forms, select Embedded Forms, choose the “Naked” form, uncheck any options you don’t need, and copy/paste the code displayed.
- Mad Mimi: Click Webform, configure your list and field choices, and click Embed. Styled Embed displays a simple iFrame. Choose Plain Embed to get all the code necessary to embed your subscription form–and edit it to yours heart’s content.
How to Pre-Check/Pre-Fill Subscription Options/Fields
Want to pre-select which options you’d like subscribers to choose? Add checked=”checked” to your checkbox code:
<input type="checkbox" checked="checked" id="mce-group[953]-953-0" name="group[953][2]" value="2" />
Save space in your subscription forms by removing the labels and instead pre-filling the fields with a “placeholder” explaining what you want them to fill out. For example:
<input placeholder="enter your email address" id="mce-EMAIL" class="required email" name="EMAIL" type="email" value="" />
How to Use Hidden Form Fields
Sometimes, I want to hide a pre-checked field so that someone is automatically subscribed to a list group. In that case, I’ll simply change the field type from above to “hidden”:
<input type="hidden" checked="checked" id="mce-group[953]-953-0" name="group[953][2]" value="2" />
How to Track Email Conversions
Pat Flynn has provided an easy tutorial on how to track email conversions in Google Analytics simply by setting up a “thank you” page on your own site that readers see immediately after entering their email address.
In addition, to track the performance of specific embedded MailChimp forms, you can create a hidden field in MailChimp, Signup Forms, General Forms, and then change the value of the hidden field per form:
<input name="SIGNUPSOURCE" id="SIGNUPSOURCE" type="hidden" value="page-about">
Check out more details on creating and tracking the signup source by visiting these tutorials:
- Tracking Signup Location via the MailChimp Embedded Forms:Official tutorial from MailChimp with great screenshots and detailed explanations.
- Segmenting a MailChimp List by Signup Source: Note that you’ll be segmenting your list by a merge field, not a group as shown in his screenshot.
- Measuring MailChimp Signup Conversions: A similar tutorial that shows more details on the hidden field creation. However, I do not recommend using his methods of adding PHP to the code and editing your theme files.
What is the most natural method you’ve found for converting visitors to subscribers?
P.S. If plugins and embedded code just aren’t your thing, and all of this about hidden fields sounds a little complicated, I’m glad to help.
hi Gretchen Louise. please help me out I have a blog about dog training
http://rahimgdogtraining.blogspot.com with little little traffic.
#someone introduce me to milchimp for email managing am confused I try setting it up so thet the signup form will show up base on my set up with addthis on my blog but it won’t show up. what do I do for the signup form to show up in my blog
#how to set a free download page with signup form.
please forgive my ignorance a just new to the game Rahim
Rahim, you’ll find my directions on giving a free download here: https://gretchenlouise.com/free-download-mailchimp-email-subscribers/
Check MailChimp’s support pages for directions on embedding a signup form.
Thank you very much! I want to grow my blog and this stuffs are really help me.
Want to choose slide-out one
Great tips! I just upgraded to Genesis and had no idea that there were so many options! Thanks!!
Oh, you will love Genesis! Have fun exploring all its features. 🙂 WPSites.net is full of great Genesis-related tips if you want more ideas.
Thanks for this very helpful post! I pinned it in hopes to go back and digest it more as I contemplate my next move.
This is a great resource. Thank you! I seriously need to work on this. Every time I try to create a mail chimp subscribe for there’s a big ugly white box around it that looks tacky. Maybe when we’re done with this flu stuff I can take another look at these links you’re provided.
It sounds like you’re grabbing the stylized MailChimp embed code that includes its own CSS. You want the “naked” form so that it doesn’t bring any clothes…er, formatting…with it. 😉
That’s the frustrating part… I really thought I used that option. Oh well… I’ll have to dig into the HTML a little or redo it or something. Maybe I still had the wrong code on my copy-paste option or something.
So…. can my theme do an after post widget? And how do I design it? I love the one from Young Wife’s Guide. But I don’t even know how to start. Lol. Or maybe I can just do the simple one that comes with Woo Themes?
You know, I think I’m going to owe you a YEAR of free coffee after all you’ve done for me.
The automatic one from WooThemes might be easiest to start off with. 🙂 And it doesn’t require an after post widget area, as it automatically inserts it right after the post. (But I set up a before post widget for you so it would be easy to add an after post widget, too.)
As to designing one like Young Wife’s Guide has after the posts, that is just one image, set as a background for the subscription form (like the style code I outlined for using in text widgets).
Terrific post, Gretchen! I knew something good was coming when you emailed the other night. Never dreamed it would be brimming over with such fantastic ideas and tips. Thanks much!
Why thank you, Sherrey! I appreciate you giving me input on your use of the Hello Bar. I hadn’t tried it out in a long time!